In this tutorial, I will be introducing action commands. We will also be building a swimming pool which will include the use of the texture and solid commands.
Building the Swimming Pool
We will build the swimming pool's solid structure first and the water later.
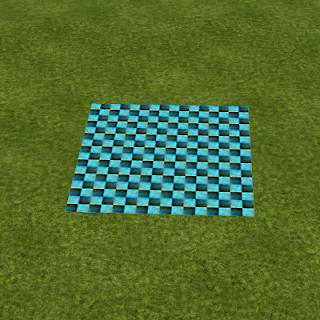
The swimming pool will take up the area of four walk objects, arranged in a square. First, find a nice spot by your house or wherever you are building. Duplicate a nearby object and make it a "walk018.rwx" object. Move it so that it is alligned with and touching the building you copied it from and then move it away in groups of eight clicks (a click is one arrow press or half a meter), so that the space between the buildings are eight, 16, 24 clicks etc. This will allow ground cover to be neatly placed between the buildings.
Now you have a tiled floor piece of your swimming pool. If you want to use a different textured objects, don't hesitate to go to the object yard and find an object with a texture you like.
Clone your floor piece three times and place the other objects around it to make a square.
Now duplicate one of the pieces, move it 4 clicks upwards and make it a "floor18.rwx", or use a number giving you a texture you like. This is a quarter the size of the walk pieces. Move into a corner above one of the walk pieces. Now make a layer of these in around the sides of the lower square.
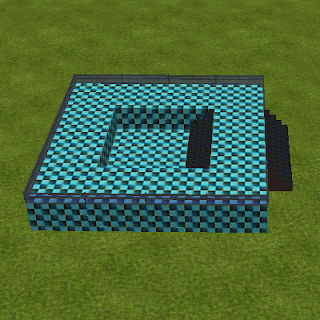
Good. Clone a piece and make it a "pp18.rwx" or a different numbered 'pp' object if you want. Align it to the with the outer edge of the square, and lower it so that it's top is level with one of the top floor objects. Move and duplicate this object so that it completely surrounds the outer edge. Then make it surround the inner sides of the top floors.
We have a basic pool structure with a walkway around the water area in the centre. But there are two more things that need adding: a rail around the outside and and stairs to get up onto the walkway from ground level, and also to get in and out of the pool.
There are several types of rail objects available. I'm going to use the "rail2t00.rwx" object but if you want to use a different one you can find them at the AWNewbie object yard. My rail object is 4 meters long, which is also as long as a single 'pp18' object. If you choose a different rail object, for the purpose of this tutorial, make sure it is the same length as the 'rail2t00' object.
Put the rail around the edge of the pool. If you duplicate it from one of the top floor objects, you will not need to adjust it's height. If you copy one of the walls, it will appear underground and to access it you will have to hold shift while flying downwards, to go through the ground. Make sure immediately press the fly up button or else you will keep falling downwards.
After you've put up the rails, on one side, delete the two inner rails to create a space for the stairs.

To make stairs, duplicate and object and rename it "stair03m.rwx". Put it outside the walkway and on the ground so that it's Y location is zero. You will notice that it is slightly above the ground. When you put ground cover around the pool, the stairs will line up with the ground cover. Rotate and move the stairs so that it lines up with the space between the rails. Make a second one and place them side by side so that they take up the whole space.
Then put two stairs on the inside of the pool area, on the opposite side of the walkway as the stairs on the outside.
Great, now we are up to the water and action commands.
Action Commands
Action commands go in the action box of an object. They consist of two parts: triggers and commands. Triggers determine when to activate the commands, while the commands perform an action on the object or other objects.
In this tutorial you will be using the "create" trigger. This trigger performs the commands when the object is seen by the user. The commands we will be using are the "texture" and "solid" commands. The "texture" command is used to change an object's texture while the "solid" command changes the solidity of objects, allowing users to pass through them without using shift. I will talk about all the other triggers and most other commands in later blog posts.
Water
First, duplicate an upper floor object and rename it as "walk000.rwx". This is a transparent walk object and will be our water. Put it in the middle so that it covers the pool part.
Now we will use an action command. First, in the action field of the object properties box, type "create". After that trigger, we can type a command. Leave a space and type "texture". This command requires that a texture name is written after it. The texture we want to make this is "water1", so leave a space after texture and then type that. Everything in the action field should now look like this: "create texture water1". Now deselect the object. It will now be updated to look like water! If it doesn't, check the spelling of the action commands.
Even though our water looks like water, it doesn't act like water, as we can walk over it. We need to use the "solid" command to allow us to walk through it (without using shift).
Select the object again. A second command is needed for the same trigger. To use more than one command, use a comma after the end of the last command. Then type the new command. What we need to type to stop the object being solid is "solid off". After the "solid" command, the words "on" and "off" determine whether the object is solid or not. The words "yes", "no", "true" and "false" also work.
Everything in the action field should now look something like this: "create texture water1, solid off".
There is one problem with our water though, there is a z-fighting issue between our water and our stairs. Z-fighting happens when two objects overlap each other or are very close to each other. It will result in part of both objects being drawn to the screen and it happens because the computer doesn't know which object is in front.
It is also unrealistic to have the water at this height. So we will move the water down. If we just move it down one, two or three clicks, they will still overlap parts of the stairs. The solution is to move the water with a fraction of a click.
To move objects more precisely, you can hold down shift. While holding shifts, you will move objects a tenth of a click with each button press. Move the water down one and a half clicks from the top by moving it down one click, then five shift-clicks.
The problem is now solved and the water is at a more realistic level.
Texturing the Stairs
There are no stair objects that have the same texture as the tiled 'walk', 'floor' and 'pp' objects. We don't have to put up with differently textured stairs, though. We can use the texture command on the stairs to make them the same texture. This particular tile texture is "tile4".
In each stair object, you need to place the code "create texture tile4". You don't have to type it in each time, just copy and paste it.
Now you have a completed swimming pool, great work!
More textures
Now that you know the texture and solid commands, you can now use them in your other buildings. I personally use the texture command with almost everything.
Here is a small list of commonly used textures to get you started with more stuff, however I will make a blog post later on dedicated to making a list of a lot more textures.
- tile1 through to tile6
- stone1 through to stone15
- brick1
- water1
- ocean4
- wood1 through to wood8
- metal1 and metal2
As well as object yards, there are texture yards out there which have lists and categories of textures. You will find links around the universe to them. For example, go to the landing zone of AlphaWorld and click the link to "Building Object Yards" underneath the number of objects sign. You will be taken to a group of teleports for object yards, but to the right is a group of teleports for texture yards.
Another good way to find new textures is to select objects by other people to find out textures they use.
That's all for this blog post. Now have fun doing more building!


No comments:
Post a Comment